6Feb2016
The kicker shaft broke today. I'd got the bike started and I noticed the lever was a bit limp looking. A bit of a wiggle and it came right off. The motor was happily idling but I decided to abandon the outing.


It looks like it's been cracked for a while. The question now is what will I replace it with? Certainly there are a number of offerings of aftermarket shafts but how good are they?
The thought occurred that it's broken where the shaft has been necked so the clamping bolt can clear. It doesn't need to be fully necked though, only enough so the bolt can pass would do. The benefit would be a stronger shaft.
This is the shaft I borrowed from another bike project, an '83 Shovel. In a study of kicker shafts it appears that they interchange from '36 to '86. Yes fifty years using the same part! There are a number of twists and turns to the tale then there's aftermarket parts to confuse and confound the issue. Extended shafts were also made by Jims for extra clearance. An original Pan shaft looks like the one in the pic below, with only a single notch for the clamp bolt so not fully necked.

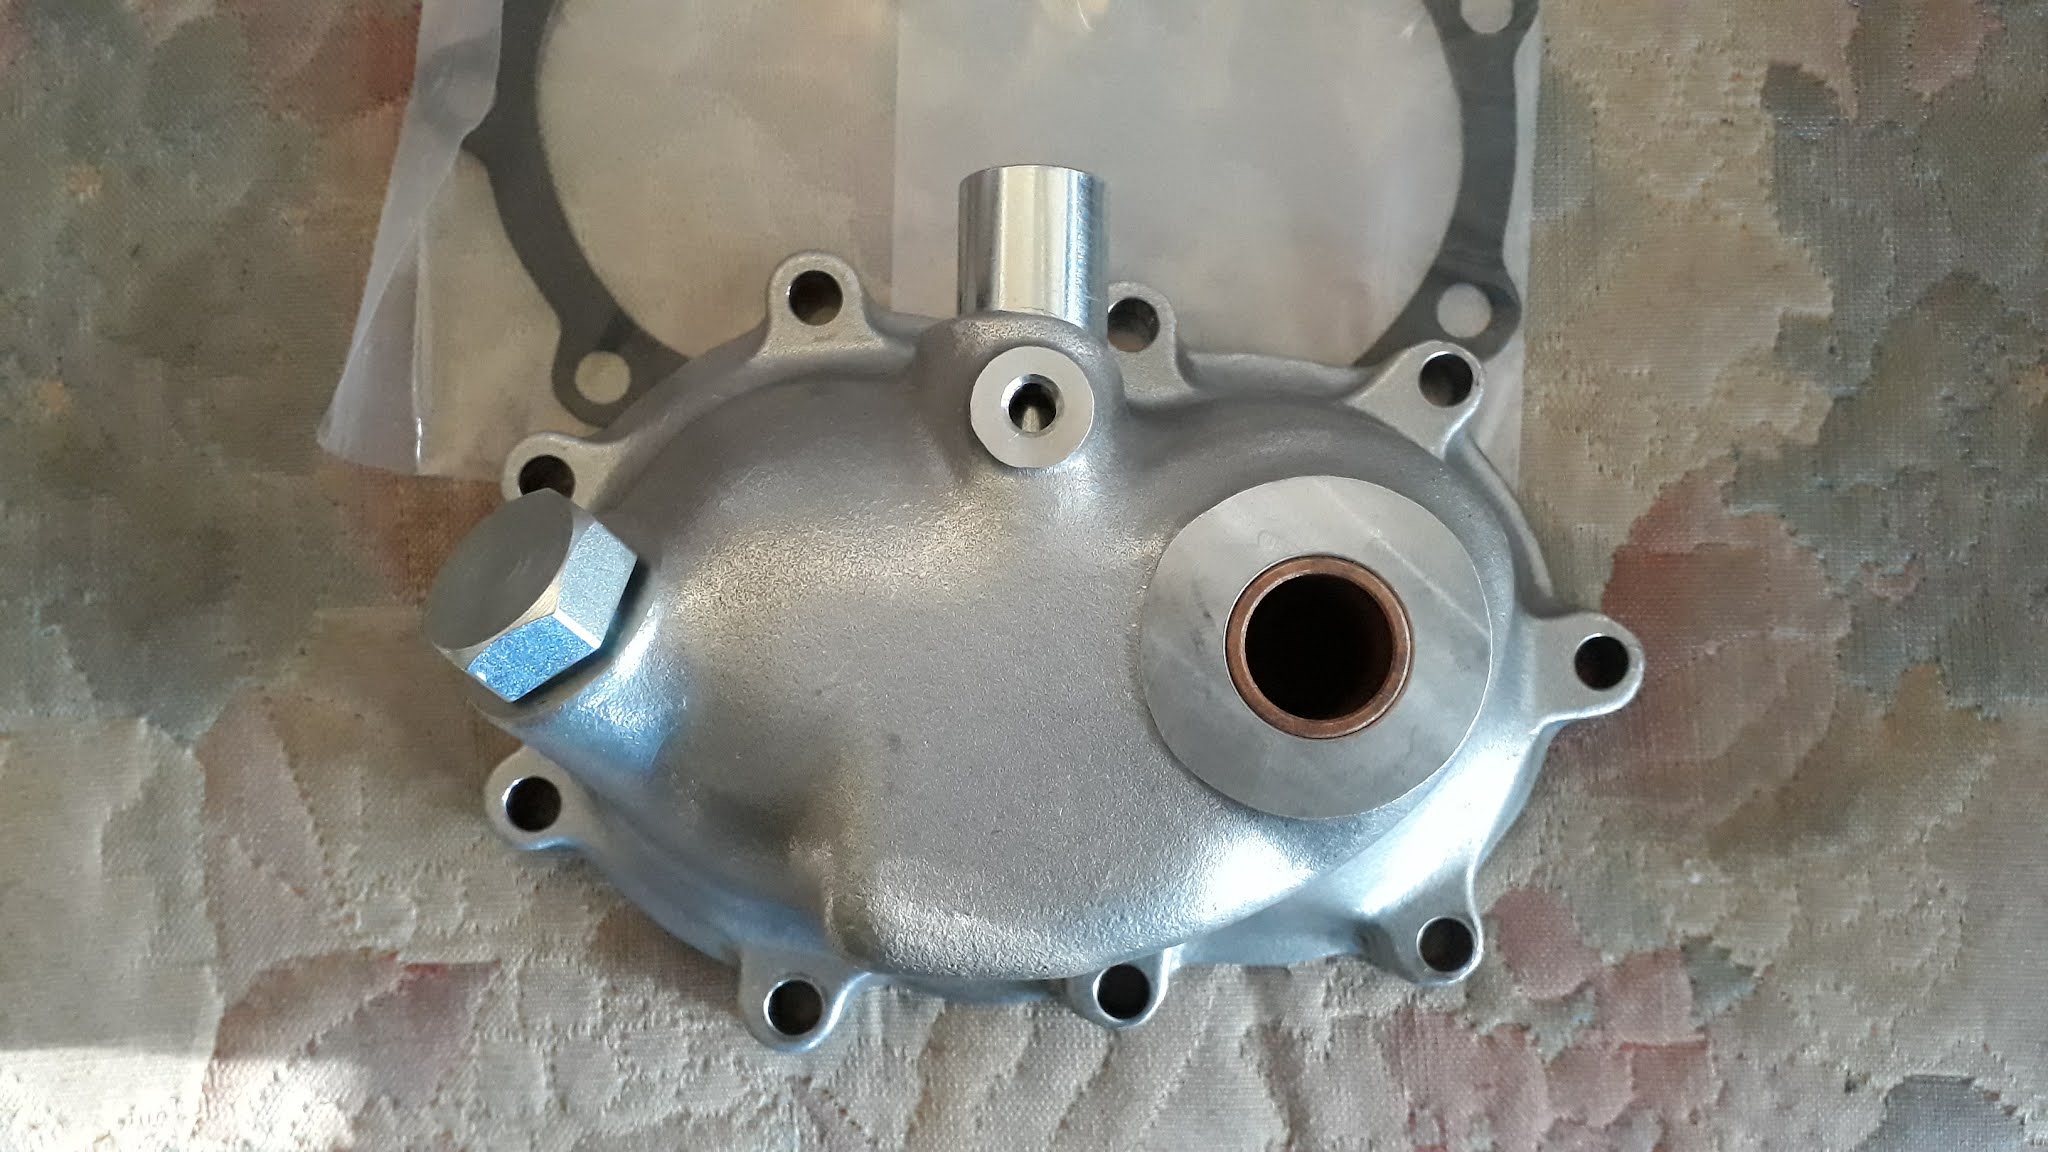
Removing the kicker cover I discovered a crack in the kick shaft housing boss.

Nestled between the two kicker shaft bushes is a seal. I found previous repairer substituted two O-rings (see pic). I was able to pick a NOS seal from HD Cycles of Hamilton, NZ., a one piece square section which fitted perfectly.

At the bottom of the clutch release shaft two washers looked poorly installed. In addition there was significant end float.

To cure the problem I pressed the upper bush in to reduce clutch fork end play. Then I added two appropriate sized washer to remedy the shaft end play.

Cleaned up nearly ready for assembly. The missing lower stud was tidied up with a die nut. The housing had previously been helicoiled for this stud.

Magnetic drain plug which I'd bought from J&P Cycles. Note the cluster of steel filings attached.

Here is the same drain plug cleaned up and with Loctite 567 Teflon sealant applied. I've used Loctite 567 for many years. It works well on drain plugs and threaded fittings. Think of it like liquid thread tape.

The kicker cover with Loctite 515 evenly applied to the mating surface and ready for installing. I used no gasket, just 'metal to metal'.

Here a small amount of discharge of the Loctite 515 is seen. This indicates a good amount was applied. Both surfaces were carefully cleaned and shined up with scotchbrite then pre-treated with acetone to thoroughly degrease. (The cover was also hand flattened on glass with wet&dry sandpaper).

Primary Cover
27Mar2016 I'd bought a derby cover gasket but it was too thick and that meant the screws weren't long enough so I cut a gasket from cork sheet. I used a wad punch for the holes. It worked nicely.

The inspection cover gasket I used Shellac to stick it to the cover. I applied grease to the primary side of the gasket to prevent it sticking. In this way I can re-use it multiple times and it will always remain adhered to the inspection cover. I also used Loctite 567 Teflon white on the screws. The dribble-leakage stopped.

Here I drilled a tiny hole to allow oil to run back to the bottom of the primary case. The thought is to not let oil sit at the gasket face so help prevent leakage.

Clutch
Clutch drag is an issue I need to solve. It makes it difficult to change gears, especially up to 2nd. Finding neutral is perhaps the most frustrating aspect.
I'm detailing the steps to fix....

I used 2nd hand red friction plates. They are segmented which I think is good. After some weeks I started to experience some grabbing, then I find talk of makers recommending an oil soak prior to fitting. Update: they never worked nicely so were swapped out for grey colored, sintered linings (by Drag Specs). See down page for more info.


Transmission Gearbox
19 May 2020
I decided it was time to inspect the gearbox. I removed it from the frame after dismantling the clutch and primary covers. The clutch nut was not very tight though it had a locktab.
Clutch puller tool.

Ready to undo mounting bolts. Box comes out via primary side.

Washed and ready for stripping.

On the benchtop.

Quickly made a mounting plate to clamp in the vise.

Gears look very good. Minor rust marks only.

Came with upgraded seal already fitted.

Bearing feels perfect. Many people suggest replacing this bearing as a matter of good measure.

Gears look in superb condition

Andrews markings..

Nice order at 1st inspection.

Steps to remedy gear shifting difficulty
Shifting was stiff changing up from 1st to 2nd in particular. This details my journey to finding the fix.
In the pic the original machine marks on the camplate are visible. I smoothed and polished them with wet&dry sandpaper. I only knocked the tops off the high spots, rounded any sharp edges etc. The object is to make the detent plunger a little more "slippery" on the camplate surface. In particular the area between 1st and 2nd including the neutral indent sharp edges were carefully radiused.

Added shim washers to shifter drum detent bolt #34064-52 to lessen spring tension. So, this was one of the first things I tried. Those shims are still there.

The shifter drum was shimmed to .001"
The shifter shaft spring #33390-26 was badly worn out. Instead I shimmed the shaft to .001" ~ .002" .
Omitted spring.
Deburred, de-rusted and polished the shifter springs #34500-52 and guide tracks #34560-52. Greased it appropriately. The object is to ensure springs can compress and decompress without snagging or binding.
Adjusted layshaft endplay. I installed it a couple thou below minimum book spec. The selector forks were shimmed.
The neutral light switch was dead plus there's no light on the dash nor any wiring. The solution was to grind the tip off so it no longer touched the camplate. This means less friction, albeit a tiny amount.
The shifter pivot and linkages were lubricated.
Currently am using 20/60 oil in engine and trans.
I decided the clutch needed to work better in order that gear shifting could improve.
I double stacked 2 new clutch pushrod seals of the upgraded (modern) type to prevent oil leakage on clutch linings.

I went back to these grey linings which were in the clutch when I got the bike.
I reduced the width of lining from the inside diameter to give a greater "mean effective radius"

Then shallow grooves were cut to resemble segments. This is closer to a modern lining construction with the thought being less drag with good grip. The lining width was eventually machined down in stages to 18mm (0.70") currently. Clutch has the Shovelhead number of plates so there's more than sufficient surface area.
I lightly pasted the blocks with never-seize, same with the drive studs.

I lightly segmented the friction lining in situ. 

I adjusted the tamer endfloat. Then I tested to ensure there was no slippage during kickstarting. The clutch frees very nicely and I can get into gear and neutral with ease.
It's the best the clutch has ever been. Also it improved gear shifting, especially the previously difficult shift, up into second.
I made a small bracket for riders' heel to get leverage on the shifter for upshifts. It works surprisingly well. I use it as a matter of habit. Originally it was much bigger but didn't leave enough room for my boot. I kept cutting it back until it had a good balance of comfort vs usability. I only need a small edge to get my heel onto. Looking at it in the pic, perhaps I could replace the 1/4" bolt with a countersunk cap screw for a smidgeon more heel space.

The gear shift performance is the best ever. It's very smooth up or down. Of note is the shifter lever has lost a lot of the sloppiness it earlier had. It's a difference that can be felt in the lever. It allows me to better feel the point of engagement so I can better "feel" it into gear.
Mousetrap retrofit
The repop arm pivot was far from a "ball and socket" that it needed to be and I also had to improve the angle at which it could work. Arm was soft so it was simply done with a cordless drill and bit.
Because the repop rod really wasn't "ball" ended but looks more like the end of a spoke I made an adaptor that better represented a ball shape. Sorry pic is poorly focused..

Cable nipples were made from 1/4" mild steel. They were drilled in the lathe and sweated on with 50/50 solder. Ferrules were made from stainless and cable has a nylon lining.

The cable clevis was fabricated from flat bar, about 2.5mm/.100"

Pig Snout Cover
I renewed the pig snout with one bought via Ebay. It looks well made.

22Oct 2021
Clutch clean hack
I noticed the clutch was getting difficult to break plates free after it had been sitting overnight or longer. The fix is to squirt Brakekleen into the plates, rotating the disengaged clutch to spread the cleaner and I achieved it without removing the primary cover. Next time I'll just unscrew the top derby screw or perhaps the one rearward and squirt as pictured.

No comments:
Post a Comment