I drew pictures of the marks for reference. They were perhaps a degree out compared to factory pictures..

Log book for record keeping.

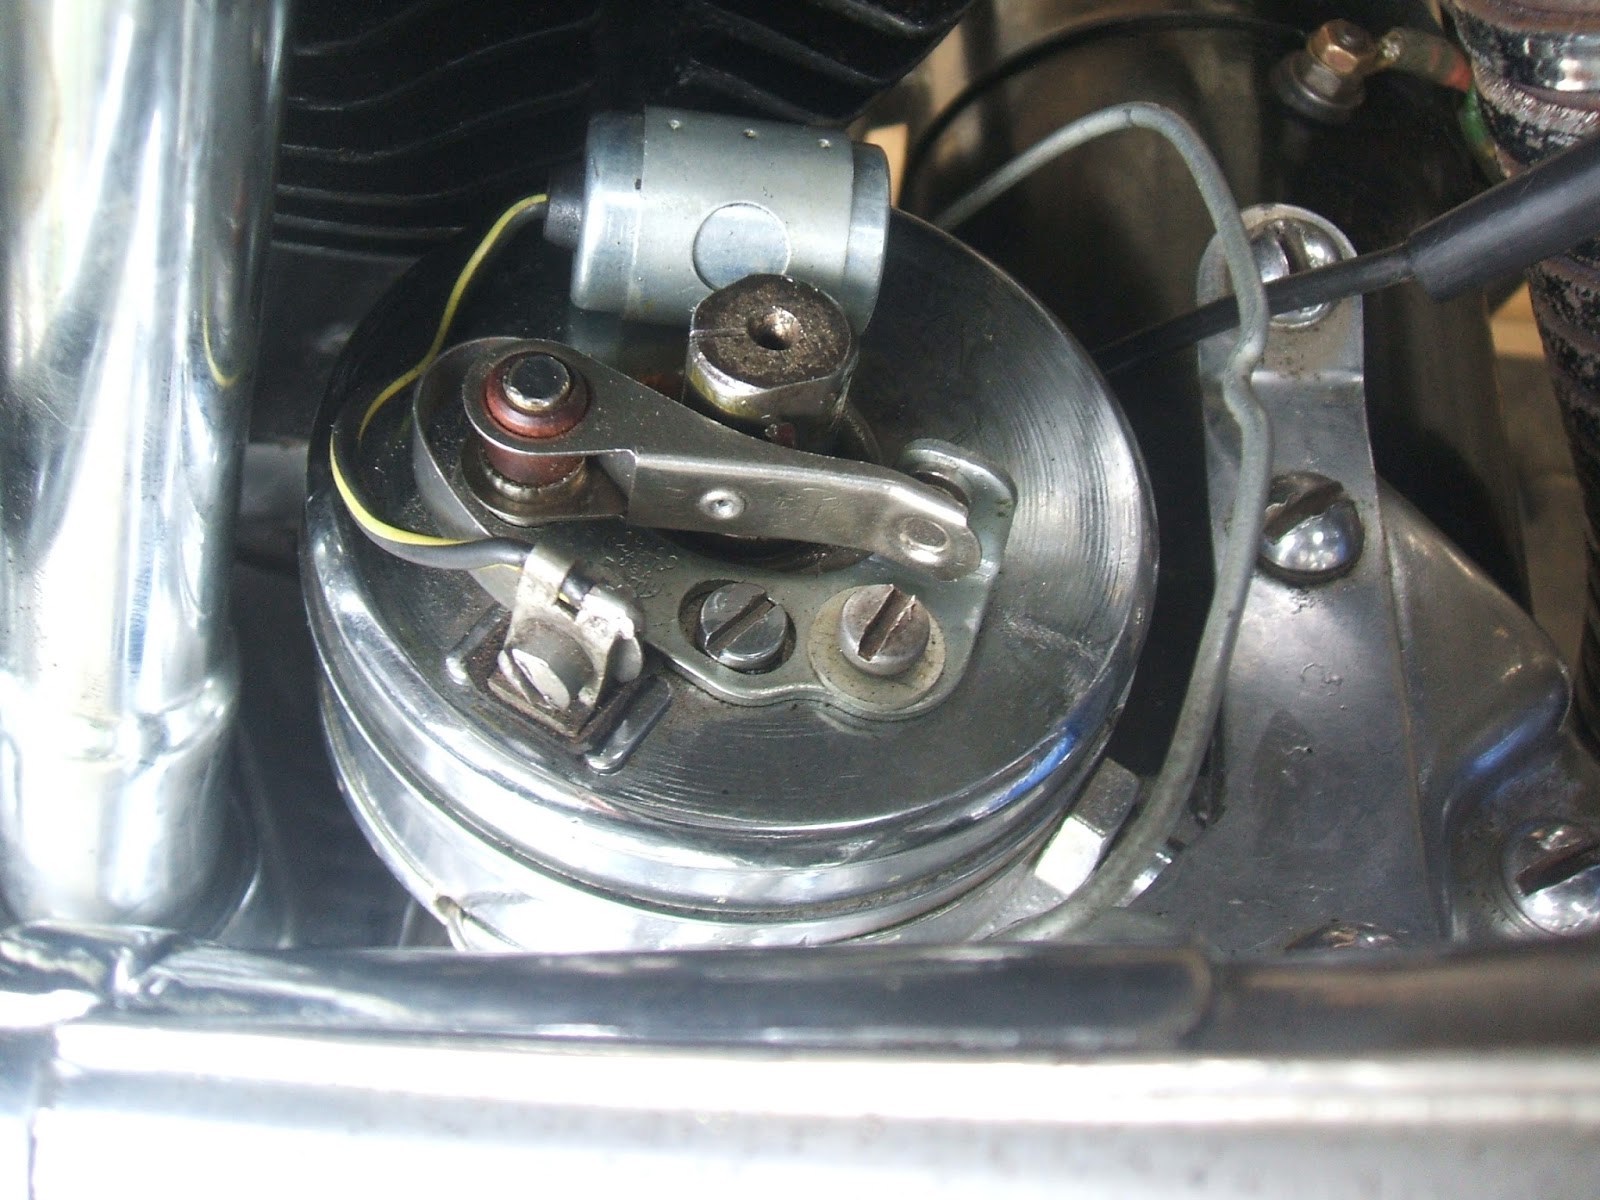
Timings marks as they appear in the timing window. True TDC and 35° marks.
Note: I punched a small dot on the case to eliminate guesswork. I recommend cleaning the timing marks with thinners, then painting with white marker pen or white paint and artist brush. I also carefully marked the rear cylinder, using black and white paint to highlight it. Strobe timing showed how poor the timer condition really was.

A special tool made to service the timer rear base bolt.. It needed heating with oxy/acetylene torch till red hot, then bending to the appropriate shape.
The bikes' timer had been severely hacked and modified to take an auto advance mechanism. As I write, I'm waiting on a single point replacement to arrive from Canada.

These pics are my old timer.

The body has been brazed and does not dismantle like stock ones.

It had a later automatic advance weight set up

It couldn't be removed without head removal else I have to cut it. It fouls the heads' fins as it lifts out.

The replacement timer arrived before the Xmas rush. It looked good. I replaced the screw that holds the points for a longer one so I could use a spring and flat washer. I fitted another condenser. It strobed well with the marks much more stable. With the front cyl dash perfectly on the mark, the rear cylinder was slightly retarded. I tickled a tiny mount off the lrading edge of the more advanced cam lobe. I was surprised how little needed to be removed to make a difference!
This pic shows a cheap repop condenser. I've since changed it for the old Delco condenser the timer came with. This gives less visible sparking at the points with early indications of better running and easier starting as well. Testing shortly...
Update: A problem remains, especially starting

6V Dyna coil

23Jan. No sooner said when another problem emerged. The engine was giving an occasional misfire, then it got progressively worse. I headed home. I began checking voltages. I discovered the ignition wire to the coil had .5 volts more when the switch was in "lights" position. I realigned the switch on the base and carefully cleaned up the hole in the dash console. It was applying pressure to the switch possibly causing havoc with the contacts. Testing next opportunity, perhaps tomorrow..

Ultimately I fitted a relay to bridge battery to coil directly. This eliminates voltage drop at switch, etc.
Re-bushing the timer
18 Dec 2019 The time came to repair the slop in the timer shaft and bushes. I bought sintered bronze bushes that were a bigger OD and smaller ID so I could turn them to exact dimensions.
Studying sintered bronze showed the bushes aren't supposed to be honed though reaming is OK if the reamer is very sharp. Machine finishing is ideal. Blunt tooling smears the sintered porous holes closed so best avoided.
Theory: The porous bush material holds oil so as the bush heats up, oil gets released for lubrication. This seems ideal in situations where oil feed is non-existant or erratic. There are a few caveats..
The shaft was polished between lathe centers using emery cloth on a flat file. The unworn part of the journal was half a thou bigger so this was carefully reduced. Fine wet & dry paper was used to get a nice finish. The shaft was rust pitted but I didn't attempt to remove it all. When the timer housing was chrome plated decades ago, the shaft was not removed so this may explain the rust pits.

I turned the bush OD to half a thou interference then pressed them in with a draw bolt made from thread stock. I used no Loctite because I didn't want it impregnating the sintered bush.

I centered the timer in the 4jaw and sized it till the shaft fitted nicely. The lower bush wasn't fitted yet so the shaft could be check-fitted at the top bush alone. Next I pulled the lower bush into place. Then I centered the timer from the other end. A steady was used to hold it in position. Finally the bush was sized and timer removed from the 4jaw. This was the moment of truth. Would the shaft slide right through, meaning that the 2 bushes were perfectly aligned. Yes, success!

The fitted bushes now need oil impregnating. I heated a small container of motor oil and let the timer sit in it, then cool. I cycled it a few times, end for end, hot and cold while immersed. The hot and cold are said to draw oil into the pores. (Do not use grease)
The sales and service of Harley-Davidson will continue in India.
ReplyDeleteFind a Casino Near Atlanta, GA Casino Near Atlanta, GA
ReplyDeleteA 남양주 출장마사지 fun gaming spot 김제 출장안마 at the Atlanta 여주 출장안마 area's top casino! Get a free chip 순천 출장안마 to play Slots, Blackjack, Roulette & 김천 출장샵 Video Poker!